Hugo 静态网站搭建
文章目录
建站流程 (Linux)
1. 下载安装Hugo
Hugo 官网: https://gohugo.io/
Hugo Git 网址:https://github.com/gohugoio/hugo/releases

1wget https://github.com/gohugoio/hugo/releases/download/v0.109.0/hugo_0.109.0_Linux-64bit.tar.gz
2mkdir /usr/local/hugo
3tar -xf hugo_0.109.0_Linux-64bit.tar.gz  -C /usr/local/hugo
设置环境变量:
1vim /etc/profile
在 export PATH 行的上方添加:
1PATH=$PATH:/usr/local/hugo
命令行中验证:
1source /etc/profile #让配置生效
2hugo version
2. 创建网站
1mkdir /www/server/hugo
2cd /www/server/hugo
3hugo new site mywebsite
4cd mywebsite
3. 选择主题
选择并下载一个主题
1#所有主题: https://themes.gohugo.io/
2git clone https://github.com/chipzoller/hugo-clarity  themes/hugo-clarity #以clarity主题为例
4. 复制示例配置
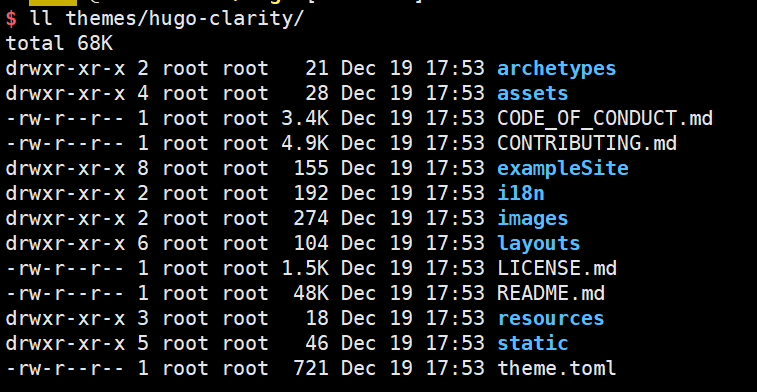
将 hugo-clarity 下 exampleSite 的内容全部复制到 /www/server/hugo/mywebsite 下,这样可以利用示例网站的很多设置和样式
1cp themes/hugo-clarity/exampleSite/* /www/server/hugo/mywebsite -r
5. 修改域名
修改域名 example.com 为自己申请的域名,如 www.mywebsite.com,写法如下:
1# 修改目录 /www/server/hugo/mywebsite 下所有文件中的域名example.com 为 www.mywebsite.com
2sed -i "s/example.com/www.mywebsite.com/g" `grep 'example.com' -rl /www/server/hugo/mywebsite`
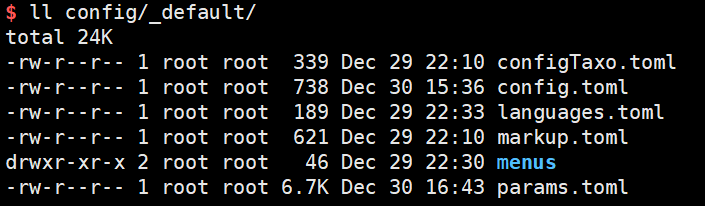
6. 修改配置文件
修改配置文件,位置在 config/_default , 详细修改可以参考主题的文档
6.1 主配置文件: params.toml
一些重要参数含义:
 1# 开启全文搜索
 2enableSearch = true
 3
 4# socials
 5introDescription = "学无止境." # 右侧简介
 6
 7showShare = false #
 8
 9# limit the number of taxonomies links shown on the sidebar of each page by default.
10numberOfTagsShown = 14 #  标签数量
11
12# 资源默认路径
13# Images:
14imagesDir = "images/" # without a leading forward slash
15# Icons:
16iconsDir = "icons/" # without a leading forward slash
17# Fonts:
18fontsDir = "fonts/" # without a leading forward slash
19
20# Logo image
21logo = "logos/logo.png"
22
23# 代码行数上限
24codeMaxLines = 50
25
26# 显示代码行号
27codeLineNumbers = true
28
29# enable math notation. Switch to `true` to enable mathjax in your site.
30enableMathNotation = false
31
32# 文章所在目录
33mainSections = ["post"]
34
35# 网站显示风格
36enforceLightMode = false
37# enforceDarkMode = false
38
39# 开启评论
40comments = false
41
42# 文章标题下显示分类标签
43pinFeatured = true
44
45# Maximum number of pinned featured posts. (default: 8)
46# numberOfPinnedPosts = 8
6.2 修改菜单
菜单位置:./config/_default/menus/menu_en.toml
直接在 menu_en.toml 文件上修改菜单项,如果另外创建中文文件会影响全文搜索功能
配置示例:
 1[[main]]
 2  name = "首页" # 一级菜单
 3  url = ""
 4  weight = -110
 5
 6# Submenus are done this way: parent -> identifier
 7[[main]]
 8  name = "链接" # 一级菜单
 9  identifier = "Links"
10  weight = -108
11[[main]]
12  parent = "Links" # 上一级id
13  name = "资源下载" # 二级菜单
14  url = "xxx"
15[[main]]
16  parent = "Links" # 上一级id
17  name = "过程考核" # 二级菜单
18  url = "xxx"
19 [[main]]
20  name = "关于" # 一级菜单
21  url = "about/"
22  weight = -107
6.3 文章列表页的缩略图
文章的顶部增加属性:thumbnail: //images/xxxx.png
6.4 中文名称配置,网站底部内容配置:
位置:/themes/hugo-clarity/i18n/en.toml
配置示例:
 1[read_more]
 2other = "阅读更多"
 3
 4[copyright]
 5other = "Copyright"
 6
 7[all_rights]
 8other = "All Rights Reserved. Powered by Hugo"
 9
10[share_on]
11other = "分享到"
12
13[featured_posts]
14other = "精选文章"
15
16[recent_posts]
17other = "最新文章"
18
19[404_title]
20other = "页面不见了"
21
22[could_not_find]
23other = "页面不存在或已被删除"
24
25[go_back]
26other = "返回"
27
28[translations]
29other = "翻译"
30
31[categories]
32other = "分类"
33
34[tags]
35other = "标签"
36
37[series]
38other = "专栏"
39
40[all_categories]
41other = "所有分类"
42
43[all_tags]
44other = "所有标签"
45
46[all_series]
47other = "所有专栏"
48
49[overview]
50other = "文章目录"
51
52[reading_time]
53other = "{{ .ReadingTime }} 分钟 阅读"
54
55[series_posts]
56other = "Posts in this series"
7. 创建文章
1cd /www/server/hugo
2hugo new content/post/2025-01-01-article.md
8. 发布网站
1cd /www/server/hugo
2hugo
宝塔面板配置
安装宝塔面板,在其中安装 nginx,设置网站地址 /www/server/hugo/mywebsite/public, 运行 nginx即可访问站点
1#CentOS 安装宝塔面板:
2yum install -y wget && wget -O install.sh https://download.bt.cn/install/install_6.0.sh && sh install.sh ed8484bec
3
4#Ubuntu 安装宝塔面板:
5wget -O install.sh https://download.bt.cn/install/install-ubuntu_6.0.sh && sudo bash install.sh ed8484bec
本地与服务器同步
可以在本地编辑博客文章(图片),然后同步到服务器,静态网页可以在本地生成,也可以在服务器端生成
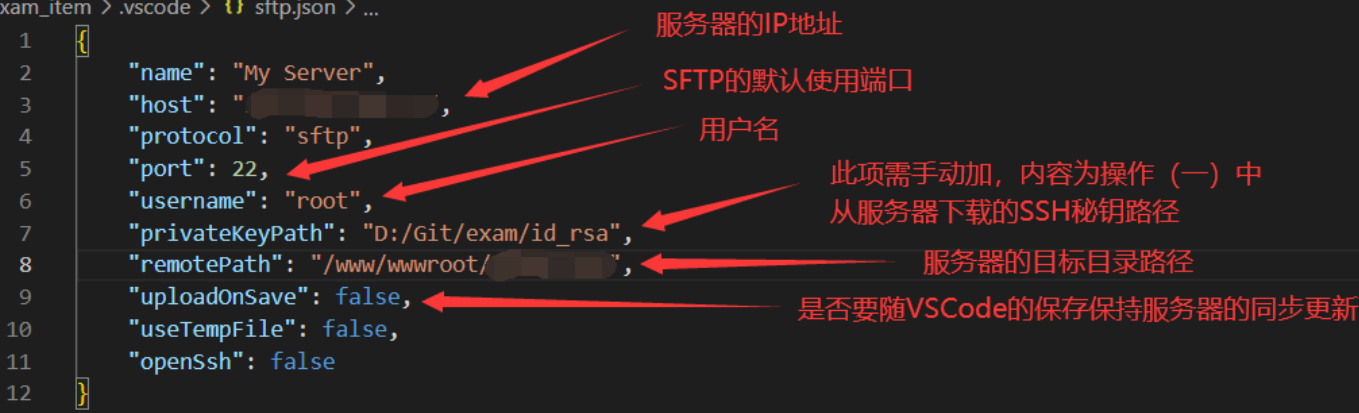
本地工具: VSCode + Markdown Preview + Paste Image + SFTP
-
本地创建网站文件夹如 网页文件夹:E:/web/post ,图片文件夹:E:/web/images
-
使用 VSCode 打开 E:/Web , 在 post 下编写文章【可以先在服务器端生成文章,同步到本地编辑】,使用 Markdown Preview 插件实时查看效果
-
图片使用 Paste Image 插件自动命名并保存到 E:/web/images,图片链接也会自动插入文章中
Paste Image 设置:Base Path: ${projectRoot}/images, Path: ${projectRoot}/images, Prefix: /images/
-
文章写好后,可以使用 SFTP 将 post 和 images 文件夹或其中的文件上传到服务器端
[Control+Shift+p] >> [SFTP] 配置
- 服务器端执行 hugo 发布网站
修改文章模板
修改网站根目录下的 archetypes/post.md 文件,路径如:
1/www/server/hugo/archetypes/post.md
修改内容如:
 1---
 2title: "{{ replace .Name "-" " " | title }}"
 3author: crs811
 4type: post
 5date: {{ .Date }}
 6toc: true
 7thumbnail: /images/thumbnail-2.png
 8categories:
 9  - Tech
10tags:
11  - Tag_name1
12  - Tag_name2
13---
附录:Hugo 常用命令
 1#查询所有命令
 2hugo -h
 3
 4#创建Hugo 静态网站
 5hugo new site mywebsite
 6
 7#创建文章, 当前必须mywebsite下才可创建文章
 8#创建的文章存放在 mywebsite/content/p/test.md下
 9hugo new p/test.md
10
11#启动服务, 必须在mywebsite文件夹下启动 (没有宝塔面板,则需要自己运行 web服务)
12hugo server
13
14#草稿也预览, -D 参数, 必须在mywebsite文件夹下启动
15hugo -D server
16
17#指定预览的主题, 必须在mywebsite文件夹下启动
18#papermod是在themes文件夹下的主题名称
19hugo -D server --theme=papermod
20
21#指定预览的端口
22hugo -D server  --port=1313
23
24#指定服务绑定在哪个端口, 比如你想在手机预览, 电脑手机同一局域网时
25#电脑ip 192.168.1.20, 手机访问192.168.1.20就能看到预览
26hugo -D server --bind="192.168.1.20" --port=80
27
28#指定预览的默认地址, http://192.168.1.20:1313
29
30错误示例
31hugo -D server --baseUrl="http://192.168.1.20/" --port=1313
32
33#访问不到, 没有绑定ip, 访问http://192.168.1.20:1313失败, 访问localhost:1313则显示
34#访问任意链接被定位到http://192.168.1.20:1313上
35
36正确做法,绑定当前ip.提醒baseUrl最后结尾必须是'/'
37hugo -D server --baseUrl="http://192.168.1.20/" --port=1313 --bind="192.168.1.20"
38
39#指定配置文件
40hugo -D server --config=config.yml
41
42#指定输出静态博客网站的目录 www.crs811.com, 再次提醒baseUrl最后一位是/
43hugo --theme=papermod --baseUrl="https://www.crs811.com/" --destination="www.crs811.com" --config=config.yml